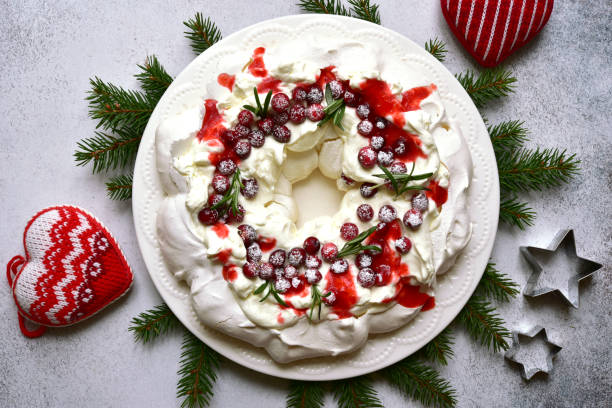
We all love a pav. The meringue, crunchy on the outside, soft and slightly chewy on the inside, the freshly whipped cream and the tumbling of fruit over the entire, glorious mess.
However, things can so easily go wrong when making a meringue.
It should be simple. Just add 55g caster sugar for every eggwhite you whip. In fact, the difference between success and failure lies in guarding against these four natural enemies of the pavlova.
Alien matter is no yolk.
Enemy #1: Unwanted fat or a little bit of egg yolk may stop your egg whites from whipping properly, so be careful when separating your eggs. Don’t let any yolk get in with the whites, or it could compromise your whip.
Cold eggs separate more easily, so use eggs straight out of the fridge. Allow them to come to room temperature, covered, before whipping, though, because room temperature eggs whip up better as they find it easier to incorporate air.
Also, be sure to use clean utensils and a clean bowl. They should be absolutely dry.
Fat is harder to remove from plastic bowls, so guard against this by whipping egg whites in metal, glass, or ceramic bowls rather than plastic.
Wiping your bowl with vinegar is another precaution against unwanted alien incursions and removes hidden fat residues. The acid will actually help stabilize your whipped whites, too. That’s why we add cream of tartar to our pavlova recipes. If you use a little more vinegar in the meringue, you’ll encourage a soft center and a crisp shell.
Adding cornflour has the same result but ruins the pav by making it floury. Yuck! Lots of recipes will recommend this, but please don’t do it.
https://www.delicious.com.au/recipes/coconut-passionfruit-pavlova-cake-recipe/mdfy4izc
The sweet strife
Enemy #2: Two major issues can occur with the incorporation of sugar. If you don’t beat it into the egg whites for long enough, the meringue can be grainy. Remember that caster sugar dissolves more easily than granulated sugar as the crystals are smaller.
Add sugar little by little, as this will help it incorporate more quickly without the risk of overwhipping your meringue. Check on the incorporation of the sugar by rubbing the meringue between your thumb and forefinger to check that there is no graininess.
Once the sugar is incorporated, you want a rich, thick, glossy, stable, hard-peaking foam. It’s the sort of foam in which your beaters leave a ribbony trail.
Another doesn’t? If you add the sugar too slowly, the meringue mixture will become too fluffy, and the texture of the pavlova will end up being too aerated.
Whip it good (not too good)
Enemy # 3: If you overwhip your egg whites, you risk making them too firm, and they may lose their moisture. This will affect the meringue’s crispness, as well as make it more likely to collapse or weep beads of sugar.
So start whisking the egg whites at a slow speed to form soft peaks, then speed up the mixer only when the sugar is added.
If you overwhip the mixture after adding the sugar, your meringue may crack. Overwhipped eggwhites look like they are curdled and cannot be rescued, so beware.
A soft peak peaks, but its tip softly collapses down on itself. We want a firm peak for a finished pavlova meringue that stays standing proud.
Keep it dry as a bone.
Enemy #4: Moisture is the deadly enemy of meringues. It can draw the sugar out of the meringue, leaving it crying sweet sugar tears. The secret to a good, crisp pavlova is in the drying of the meringue after cooking.
If there is a lot of moisture in the air, whether from humidity or even other cooking, you are doing in the kitchen, you will have problems. That’s why the “Pavlova Nazi” in me insists on no boiling saucepans during pav time. There is also an old wives’ tale that older eggwhites make a more stable meringue, which could be because they have lost some of their moisture.
When the meringue is cooked, please turn off the oven, leave the door ajar, and let it fully dry out for a nice, crisp shell.
Shh, it’s a secret.
For a good-looking meringue, trace a circle on the underside of your baking paper to act as a template. Secure the paper to the baking tray with little globs of meringue in each corner and rub the baking paper with some coconut oil to grease it.
When you have dolloped the meringue onto the paper, pat it down with the back of a wooden spoon and create swirls around the edge with the back of a teaspoon. I like my pav to bulge at the sides, but if you want it more upright, use a palette knife to sweep upwards around the edges.


+ There are no comments
Add yours